
Mitsubishi MXZ Installation Manual: A Comprehensive Guide
Navigating Mitsubishi forums reveals discussions on various models—ASX, Eclipse Cross, L200, Outlander, Pajero, Carisma, Galant, Sapporo, Sigma, Colt, Lancer, and Space Star․
Understanding the MXZ Series
The Mitsubishi MXZ series represents a diverse range of multi-split air conditioning systems, catering to both residential and light commercial applications․ Online forums highlight a vibrant Mitsubishi community discussing models like the ASX, Eclipse Cross, and Outlander, demonstrating a broad user base․ These systems are known for their individual zone control, allowing customized temperature settings in different areas of a building․
Understanding the core components – indoor units, outdoor units, and refrigerant lines – is crucial․ The MXZ series offers various indoor unit styles, including wall-mounted, ceiling cassette, and ducted options․ Forums also mention models like the Carisma and Space Star, indicating Mitsubishi’s extensive product line․ Proper selection depends on the specific heating and cooling needs, room size, and architectural constraints․ Careful consideration of these factors ensures optimal performance and energy efficiency․
Identifying Your Specific MXZ Model
Accurately identifying your specific MXZ model is paramount before commencing any installation or maintenance work․ Mitsubishi forums showcase discussions across numerous models – ASX, L200, Pajero, Colt, and Lancer – emphasizing the breadth of their offerings․ The model number is typically found on the unit’s nameplate, usually located on the indoor or outdoor unit’s casing․
This number provides critical information regarding the system’s capacity, refrigerant type, and electrical specifications․ Referencing the model number in the official Mitsubishi installation manual ensures you’re using the correct procedures and components․ Online communities often share experiences with specific models, like the Eclipse Cross and Space Star, offering valuable insights․ Incorrect identification can lead to compatibility issues and potentially damage the system, so double-checking is essential for a successful installation․
Safety Precautions Before Installation
Prioritizing safety is crucial before beginning any Mitsubishi MXZ installation․ Disconnect all electrical power to the designated circuit before commencing work to prevent electric shock․ Wear appropriate personal protective equipment (PPE), including safety glasses, gloves, and sturdy footwear․ Ensure the installation area is well-ventilated, especially when handling refrigerant․
Mitsubishi forums highlight user experiences with various models – ASX, Outlander, and Space Star – reinforcing the importance of careful preparation․ Never attempt to modify or repair refrigerant lines; always consult a qualified technician․ Be aware of potential pinch points and sharp edges on both indoor and outdoor units․ Confirm local regulations regarding refrigerant handling and disposal․ Ignoring these precautions can lead to serious injury or system damage, so meticulous adherence is non-negotiable․
Tools and Materials Required
A successful Mitsubishi MXZ installation demands specific tools and materials․ Essential tools include a refrigerant manifold gauge set, vacuum pump, flaring tool, tube cutter, adjustable wrenches, screwdrivers (Phillips and flathead), wire strippers, and a multimeter․ Electrical testing equipment is vital for safe connections․

Materials needed encompass refrigerant piping (copper or approved alternatives), insulation tape, brazing alloy, nitrogen for leak testing, electrical wiring (correct gauge for the circuit), conduit, and appropriate mounting hardware․ Discussions within Mitsubishi forums regarding models like the ASX and Eclipse Cross emphasize the need for quality components․ Don’t forget sealant for drain lines and a level to ensure proper unit positioning․ Having a comprehensive checklist prevents delays and ensures a professional installation․
Installation Process: Indoor Unit
Forums discuss Mitsubishi models—ASX, Eclipse Cross, and Space Star—highlighting meticulous preparation․ Proper mounting, refrigerant connections, electrical wiring, and drainage are crucial steps;
Mounting the Indoor Unit
Securely mounting the indoor unit is paramount for optimal performance and longevity of your Mitsubishi MXZ system․ Begin by carefully selecting a location that allows for adequate airflow and avoids direct sunlight or heat sources․ Ensure the wall can support the unit’s weight, considering both static and dynamic loads during operation․
Utilize the provided mounting bracket, ensuring it is level and firmly attached to the wall using appropriate screws and anchors for the wall type․ Double-check bracket stability before proceeding․ Carefully lift the indoor unit onto the bracket, verifying it’s securely seated․
Pay close attention to clearances around the unit, as specified in the installation manual, to facilitate future maintenance and servicing․ Discussions within Mitsubishi forums emphasize the importance of a robust and level mounting to minimize vibration and noise․ Proper installation prevents potential issues down the line, ensuring quiet and efficient operation․
Connecting Refrigerant Piping
Proper refrigerant piping connection is critical for the efficient operation and longevity of your Mitsubishi MXZ system․ Begin by carefully flaring the refrigerant lines to the correct specifications, ensuring a tight and leak-proof seal․ Use only the refrigerant type specified in the MXZ manual – mixing types can cause severe damage․
Connect the flared lines to the corresponding ports on the indoor and outdoor units, tightening the flare nuts securely with a wrench․ Avoid over-tightening, which can damage the fittings․ Purge the lines with nitrogen to remove any air or moisture before opening the refrigerant valves․
Regularly check for leaks using a refrigerant leak detector after connection and during commissioning․ Online Mitsubishi communities highlight the importance of meticulous work during this stage, as leaks significantly reduce system efficiency and can harm the environment․
Electrical Connections: Indoor Unit
Establishing secure and correct electrical connections to the indoor unit is paramount for safe and reliable operation․ Always disconnect the main power supply before commencing any electrical work․ Refer to the wiring diagram provided in the MXZ installation manual to identify the correct wiring configuration for your specific model․
Connect the power supply wires to the designated terminals on the indoor unit’s control board, ensuring proper polarity․ Ground the unit appropriately to prevent electrical shock․ Use appropriately sized wiring and secure all connections tightly to avoid loose wires or arcing․
Mitsubishi forums emphasize the importance of double-checking all connections before restoring power․ Incorrect wiring can lead to system malfunction or even fire hazards․ A qualified electrician should perform or verify these connections․
Drainage Setup: Indoor Unit
Proper drainage is crucial to prevent water damage and maintain optimal performance of your Mitsubishi MXZ indoor unit․ Condensate water generated during cooling operation must be effectively removed․ Connect a drain hose to the designated drain outlet on the indoor unit․
Ensure the drain hose has a continuous downward slope to facilitate gravity-driven drainage․ Avoid kinks or obstructions within the hose․ The hose should terminate in a suitable drain pan or connect to a building’s existing drainage system, adhering to local plumbing codes․
Regularly inspect the drain hose and pan for clogs or algae buildup․ Mitsubishi forums highlight potential drainage issues, emphasizing the need for preventative maintenance․ Proper installation and routine checks will prevent water leaks and ensure long-term system reliability․
Installation Process: Outdoor Unit
Mitsubishi forums discuss models like ASX, Eclipse Cross, and Space Star, but outdoor unit installation requires careful positioning and secure electrical connections for efficiency․
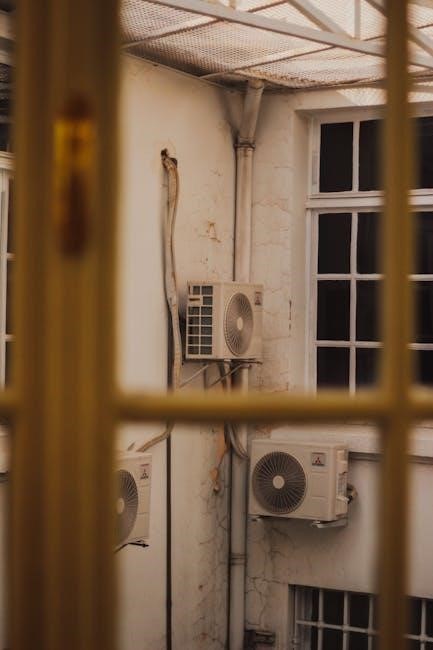
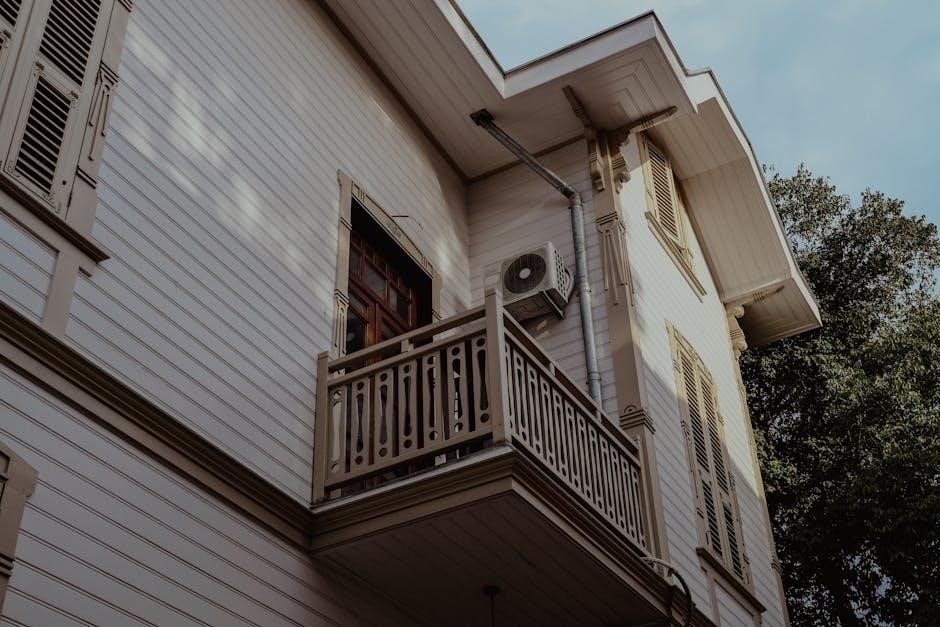
Positioning the Outdoor Unit
Careful consideration must be given to the location of the outdoor unit to ensure optimal performance and longevity of the Mitsubishi MXZ system․ Select a location that provides adequate airflow, free from obstructions like shrubs, fences, or other debris that could restrict ventilation․
The unit should be installed on a stable, level surface capable of supporting its weight, even during periods of high wind or seismic activity․ Avoid direct sunlight exposure, as this can reduce cooling efficiency․
Maintain sufficient clearance around the unit for servicing and maintenance access – typically at least 30cm on all sides․ Furthermore, consider noise levels; positioning the unit away from bedrooms or living areas can minimize disturbance․ Discussions within Mitsubishi forums highlight the importance of proper installation for various models, including the ASX and Outlander, suggesting a similar meticulous approach is vital for the MXZ series․ Ensure compliance with local building codes and regulations regarding outdoor unit placement․
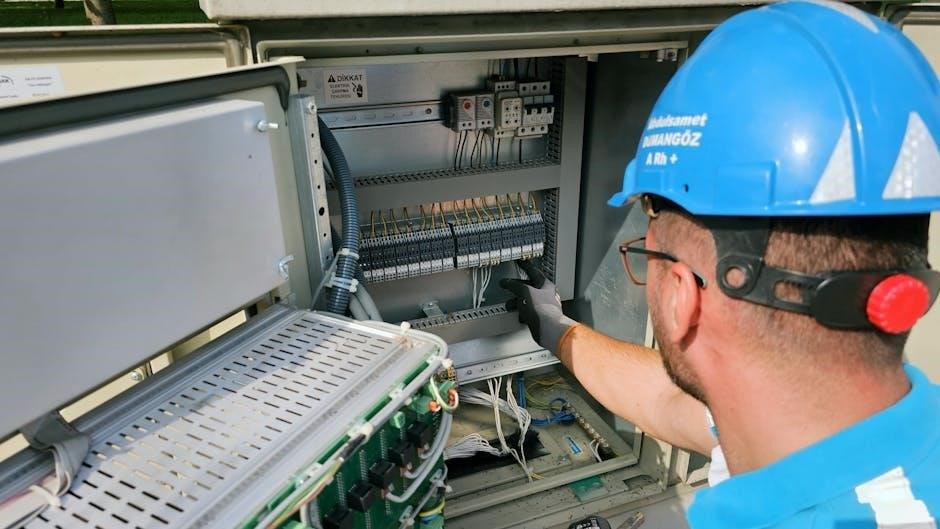
Electrical Connections: Outdoor Unit
Prior to commencing electrical connections, absolutely ensure the power supply to the outdoor unit is completely disconnected at the breaker․ Verify the voltage and frequency of the power supply match the unit’s specifications detailed in the installation manual․ Use appropriately sized wiring and conduit, adhering to all local electrical codes and regulations․
Connect the power cables to the designated terminals within the outdoor unit’s control box, ensuring secure and tight connections․ Proper grounding is crucial for safety and to prevent electrical interference․ Double-check all connections before restoring power․
Mitsubishi forums frequently discuss service costs and maintenance for models like the Space Star, emphasizing the importance of qualified technicians․ Similarly, electrical work on the MXZ unit should only be performed by a licensed and experienced electrician․ Refer to the wiring diagrams provided with the unit for specific connection details and always prioritize safety․
Refrigerant Piping Connection: Outdoor Unit
Carefully connect the refrigerant piping to the designated ports on the outdoor unit, ensuring proper alignment and tightness to prevent leaks․ Utilize flare nuts and appropriate sealing techniques as specified in the Mitsubishi MXZ installation manual․ Before making connections, purge the refrigerant lines to remove any air or moisture, which can compromise system performance․
Properly insulate all refrigerant piping runs to minimize heat gain or loss, maintaining system efficiency․ Regularly check for leaks after connection, using a refrigerant leak detector․ Discussions within Mitsubishi forums highlight the importance of qualified technicians for complex tasks like refrigerant handling․
Remember, handling refrigerant requires specialized knowledge and adherence to environmental regulations․ Incorrect connections or leaks can lead to reduced cooling capacity and potential environmental damage․ Always consult the manual and prioritize safety during this critical step․
Commissioning and Testing
Following installation, a thorough commissioning process is crucial for optimal performance․ Begin by verifying all electrical connections and ensuring correct voltage supply to both indoor and outdoor units․ Initiate a test run, monitoring the system for proper operation, including airflow, temperature, and fan speeds․ Mitsubishi forums emphasize the importance of qualified technicians for this stage․
Check refrigerant pressures against the manufacturer’s specifications, adjusting if necessary․ Inspect all refrigerant piping connections for leaks using an electronic leak detector․ Confirm the remote controller functions correctly, allowing for temperature adjustments and mode selection․
Document all test results and settings for future reference․ Address any identified issues promptly, referring to the Mitsubishi MXZ installation manual for troubleshooting guidance․ A successful commissioning ensures efficient and reliable operation․
Advanced Installation Considerations
Mitsubishi forums discuss service costs for models like the Space Star, and PHEV maintenance, highlighting the need for detailed planning and expertise․
Wiring Diagrams and Schematics
Accessing precise wiring diagrams and schematics is paramount for a successful Mitsubishi MXZ installation․ These diagrams, often model-specific, detail the intricate connections between the indoor and outdoor units, the control systems, and the power supply․
Understanding these schematics ensures correct polarity and proper grounding, preventing electrical faults and potential damage to the system․ Online Mitsubishi communities and forums, while discussing various models like the ASX and Outlander, emphasize the importance of referencing the official installation manual for accurate wiring information․
Incorrect wiring can lead to compressor failure, control board malfunctions, or even safety hazards․ Therefore, a thorough review of the schematics, coupled with a clear understanding of electrical principles, is crucial before commencing any wiring work․ Always verify compatibility and adhere to local electrical codes․
Refrigerant Charge Calculation

Accurate refrigerant charge calculation is vital for optimal Mitsubishi MXZ system performance and efficiency․ The correct charge ensures proper cooling or heating capacity, prevents compressor damage, and minimizes energy consumption․

Factors influencing the required refrigerant charge include the piping length, height difference between indoor and outdoor units, and the specific MXZ model․ The installation manual provides detailed charts and formulas for calculating the precise charge needed․
Online forums discussing Mitsubishi vehicles like the Space Star and Eclipse Cross highlight the importance of precise measurements and adherence to manufacturer specifications․ Undercharging or overcharging can lead to system inefficiencies or component failure․
Always use calibrated gauges and follow the recommended charging procedures outlined in the manual․ Proper refrigerant charge is essential for long-term system reliability and performance․
Airflow Adjustment and Optimization
Optimizing airflow is crucial for maximizing the efficiency and comfort provided by your Mitsubishi MXZ system․ Proper airflow distribution ensures even temperature throughout the conditioned space, eliminating hot or cold spots․
The MXZ installation manual details methods for adjusting airflow direction using the indoor unit’s louvers and fan speed settings․ Consider room layout and obstructions when positioning the indoor unit to avoid airflow restrictions․
Discussions within Mitsubishi forums, concerning models like the ASX and Outlander, often emphasize the importance of regular filter cleaning to maintain optimal airflow․ Clogged filters significantly reduce airflow and system performance․
For multi-split systems, ensure balanced airflow across all indoor units․ Adjust individual unit settings to compensate for varying room sizes or heat loads, achieving consistent comfort levels․
Remote Controller Setup and Programming
The Mitsubishi MXZ system’s remote controller is your primary interface for managing temperature, fan speed, and operational modes․ Initial setup involves inserting batteries and pairing the remote with the corresponding indoor unit, as detailed in the installation manual․
Programming options allow customization of settings like temperature display units (Celsius or Fahrenheit) and timer functions․ Explore features such as “Good Night” mode, which gradually adjusts temperature for comfortable sleep․
Mitsubishi forums highlight user experiences with remote controller functionality across various models – ASX, Eclipse Cross, and Space Star – emphasizing the importance of understanding specific button combinations for advanced features;
Troubleshooting common issues, like unresponsive buttons or pairing failures, is often discussed․ Refer to the manual for reset procedures and ensure a clear line of sight between the remote and indoor unit․

Troubleshooting Common Installation Issues
Mitsubishi forums discuss issues with ASX, Eclipse Cross, and Space Star models, highlighting potential problems and solutions related to installation and system performance․
Leak Detection and Repair
Identifying refrigerant leaks is crucial for optimal MXZ system performance and longevity․ Begin by visually inspecting all refrigerant connections – both at the indoor and outdoor units – for signs of oil residue, which often indicates a leak point․ Employing a refrigerant leak detector is highly recommended; electronic detectors provide precise pinpointing of even minor leaks․
If a leak is detected, immediately shut down the system and isolate the leaking component․ For small leaks at flared connections, tightening the fitting may resolve the issue․ However, if the leak persists, or if the leak originates from a brazed joint or damaged component, professional repair is necessary․
Brazing requires specialized skills and equipment; improper brazing can introduce contaminants and create further leaks․ After repair, a thorough nitrogen pressure test is essential to verify the integrity of the repair and ensure no remaining leaks exist before recharging the system with refrigerant․ Always adhere to environmental regulations regarding refrigerant handling and disposal․
Electrical Fault Diagnosis
Diagnosing electrical faults within a Mitsubishi MXZ system requires a systematic approach and a multimeter․ Begin by verifying the power supply to both the indoor and outdoor units, checking voltage levels against the unit’s specifications․ Inspect all wiring connections for looseness, corrosion, or damage – paying close attention to terminal blocks and wiring harnesses․
Utilize the unit’s error code display (if equipped) as a starting point for troubleshooting․ Consult the installation manual for a comprehensive list of error codes and their corresponding solutions․ Check the compressor’s electrical components, including the capacitor and overload protector, for signs of failure․
If the fan motor isn’t functioning, test its windings for continuity․ Always disconnect power before performing any electrical tests․ Remember that Mitsubishi forums discuss various models, but electrical principles remain consistent․ If unsure, consult a qualified HVAC technician to avoid electrical hazards and ensure proper repair․

Addressing Drainage Problems
Proper drainage is crucial for the longevity of a Mitsubishi MXZ system․ Common issues include clogged drain lines, resulting in water leakage and potential damage․ Begin by visually inspecting the drain line for obstructions, such as algae or debris․ A wet/dry vacuum can often clear minor blockages․
For stubborn clogs, consider using a drain line cleaning tablet or a gentle bleach solution (diluted appropriately)․ Ensure the outdoor unit’s drain pan is clear of leaves and other debris․ Verify the drain line has a proper downward slope to facilitate water flow․
Mitsubishi forums often mention issues with condensate pumps; check their functionality if applicable․ Inspect the indoor unit’s drain pan for cracks or damage․ Addressing drainage problems promptly prevents water damage and maintains optimal system performance․ Remember to disconnect power before any maintenance․
Error Code Interpretation
Mitsubishi MXZ systems utilize error codes to diagnose malfunctions․ These codes, displayed on the indoor unit or via a service tool, pinpoint the source of the problem, streamlining troubleshooting․ Common codes relate to refrigerant leaks, sensor failures, or communication errors between units․
Consult the official Mitsubishi installation manual for a comprehensive list of error codes and their corresponding solutions․ Online Mitsubishi forums can provide additional insights from experienced technicians, detailing real-world fixes for specific codes․
Ignoring error codes can lead to further damage and reduced system efficiency․ Some codes require professional attention, particularly those indicating refrigerant issues or electrical faults․ Always prioritize safety and disconnect power before attempting any repairs․ Accurate interpretation is key to efficient and effective troubleshooting․